First look at Endpoint Privilege Management
Update: Microsoft has moved this feature from Public Preview to General Availability, I’ll update this post (or write a new post) as soon as there are some new features or significant changes introduced.
I vividly recall when this feature was first announced because I had the *privilege* to attend Microsoft Ignite in Seattle last year when it was first introduced. Now that the public preview has been released, we finally have the opportunity to play around with Endpoint Privilege Management ourselves!
For a long time, we were forced to choose between local admin or standard user permissions. Granting users local admin rights poses a significant security risk, especially with the rising threat of cyber attacks. On the other hand, assigning standard user permissions results in productivity loss for both end-users and IT personnel due to the countless requests to install or update applications.
Thankfully, Endpoint Privilege Management (EPM) provides a solution to this dilemma. EPM allows us to assign standard user permissions while creating specific rules for applications/files that are permitted to run with administrative privileges. I am happy to share my initial experience with this new feature.
This blog includes the following sections;
- Preparation
- Activate EPM
- Enable EPM for devices
- Get file hashes
- Create EPM elevation rules
- User experience
- Conclusion
Preparation
During the public preview, no license is required for this feature. However, once the preview period ends, an add-on license will be necessary to use the feature. Unfortunately, this license is not covered in the Microsoft 365 E5 suite. To try out this feature, a 90-day trial with 250 user licenses is available in the billing section of the Microsoft 365 Admin Center.
The feature has specific operating system requirements, which are as follows:
- For Windows 11, version 22H1 with KB5023774 or 22H2 with KB5022913 is required.
- For Windows 10, version 20H2, 21H2, 22H2 (or later) with KB5023773 is required.
In addition to the operating system requirements, there are also specific device and user requirements;
- Devices must be either Hybrid Azure AD joined or Azure AD joined and must be managed by Microsoft Intune.
- Users should be given standard user permissions.
Activate EPM
First, we need to activate the EPM feature in the Microsoft Intune Admin center.
- Go to Microsoft Intune admin center and navigate to Endpoint Security.
- Navigate to Manage > Endpoint Privilege Management.
- Activate the EPM feature.

Enable EPM for devices
After that we should enable EPM for our devices by creating an elevation settings policy.
- Navigate to the Policies tab and Click + Create Policy.

- Choose the Elevation settings policy profile.
- Click Create profile.

After naming our policy, we can configure the following settings;
- Endpoint Privilege Management
- Enabled will install the EPM component on the device (Default).
- Disabled will remove the EPM component if previously enabled.
- Sent data to Microsoft
- Yes or No. If set to Yes, you can configure the reporting scope to send valuable information to the Intune EPM reports.
- Diagnostic data and managed elevations only.
- Diagnostic data and all endpoint elevations (Default).
- Diagnostic data only.
- Yes or No. If set to Yes, you can configure the reporting scope to send valuable information to the Intune EPM reports.
- Default elevation response
- Deny all requests.
- Require user confirmation.
- Not configured (Default, functions the same as Deny all requests).
Because I want to enable EPM and send data to Microsoft for EPM reports, while also denying all requests, I will leave the policy on its default settings.
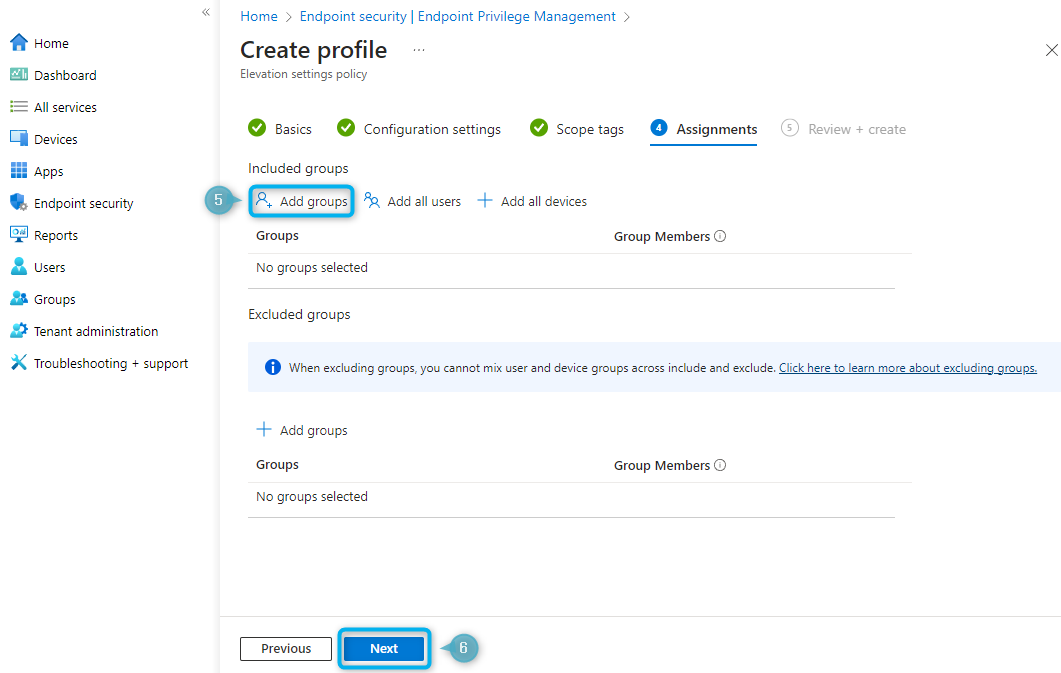
- Click Next twice. (skip Scope tags page)

- Click on Add groups (or all users/devices) to assign the policy.
- Click Next and Create.
Get file hashes
Before we can configure elevation rules, we need to obtain the file hash from the file/application that we will be setting rules for.
- Start the PowerShell or PowerShell ISE application.
- Use the following cmdlet to get the file hash for the PowerShell ISE application, you can replace my example with any other file location.
| Get-FileHash C:\Windows\System32\WindowsPowerShell\v1.0\PowerShell_ISE.exe | Format-List |
- Now you can copy the file hash because you will need it later.

Create EPM elevation rules
Now lets create the EPM elevation rules, for now I want to configure the following two rules;
- Let users install the Google Chrome application only after providing a business justification.
- Let users start the PowerShell ISE application with administrative privileges automatically.
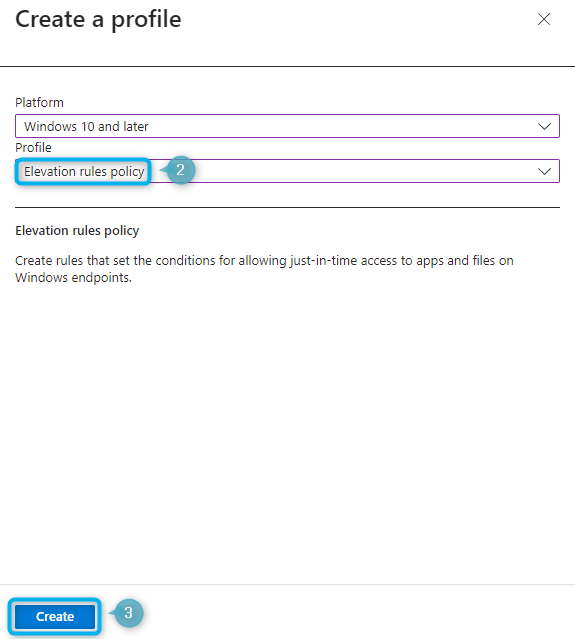
- Navigate to the Policies tab and Click + Create Policy.
- Choose the Elevation rules policy profile.
- Click Create profile.
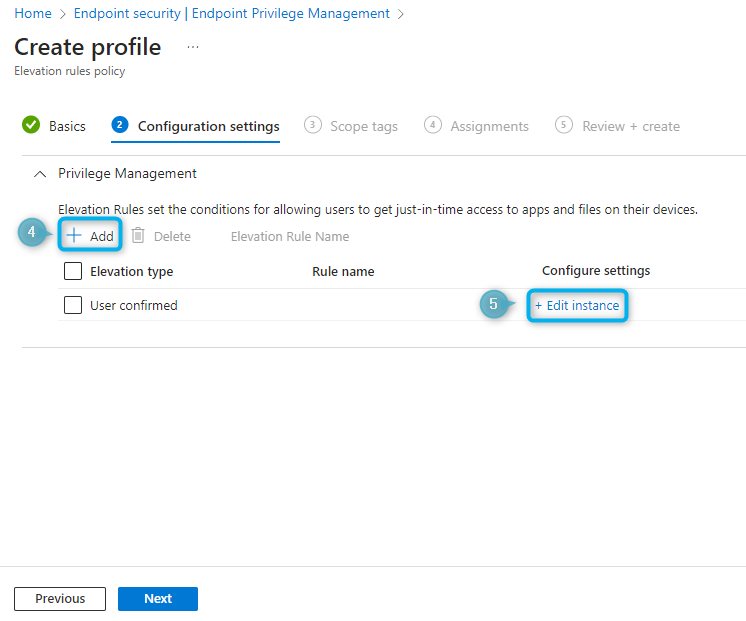
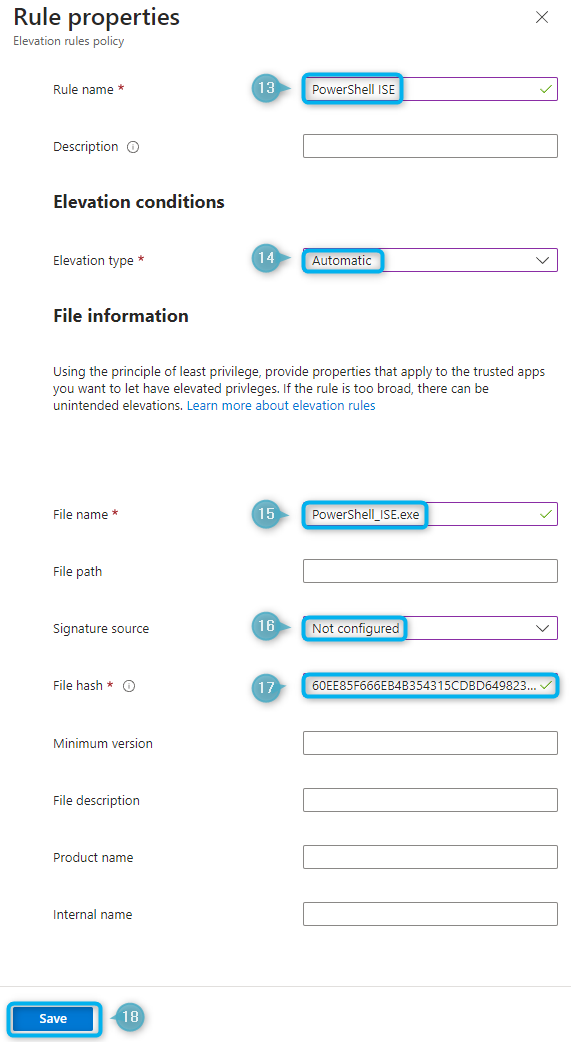
After naming our policy, let’s move on to configuring the rules.
- Click + Add to create a second rule (we will need this later).
- Click + Edit instance to edit our first rule.
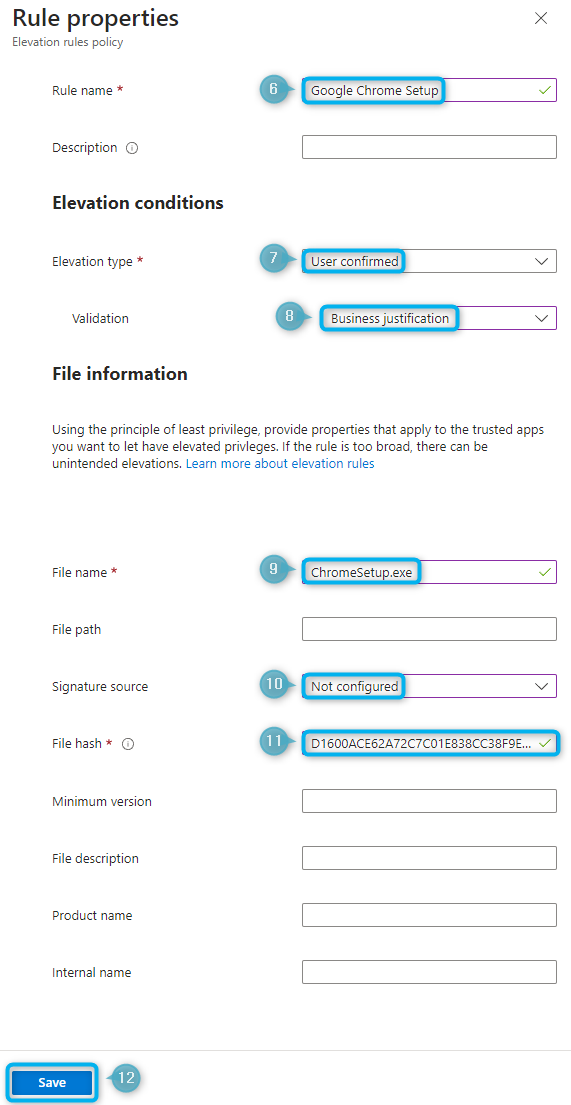
- Give the rule a name.
- Choose the elevation type User confirmed, this way an user validation is required before admin elevation.
- Choose validation Business Justification, this way a business justification is required.
- Enter the Filename (for my example this is ChromeSetup.exe).
- Set the Signature source to Not configured. Adding additional file information, such as the signature, can enhance security by providing an additional layer of confirmation.
- Copy/paste the file hash for the ChromeSetup.exe file.
- Click Save.
Now lets create our second rule.
- Click + Edit Instance on the second rule and give the rule a name.
- Choose the elevation type Automatic, this way no validation is required for elevating.
- Enter the Filename (for my example this is PowerShell_ISE.exe).
- Set the Signature source to Not configured. Adding additional file information, such as the signature, can enhance security by providing an additional layer of confirmation.
- Copy/paste the file hash for the PowerShell_ISE.exe file.
- Click Save.
- Click Next twice (skip Scope tags page) after we are done creating our elevation rules.

- Click on Add groups (or all users/devices) to assign the policy.
- Click Next and Create.

User experience
Now, lets take a look at the user experience. First let me show you how an user can try to run files with elevated access.
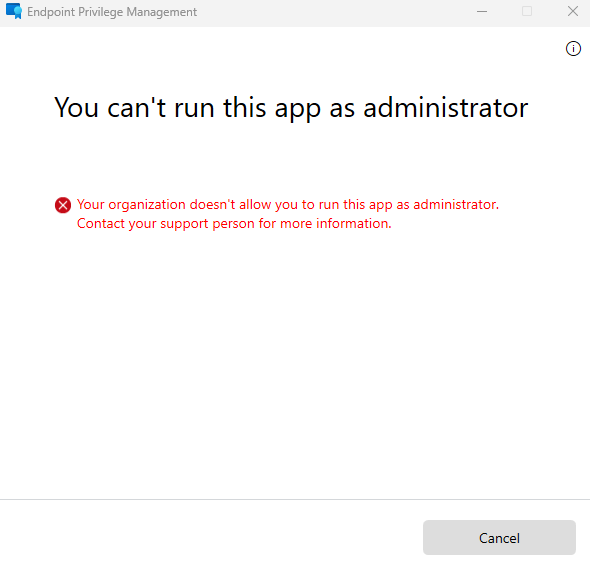
Right click any file and click on the Run with elevated access option.

Because we didn’t include the Command Prompt application in our policy, it did not work.
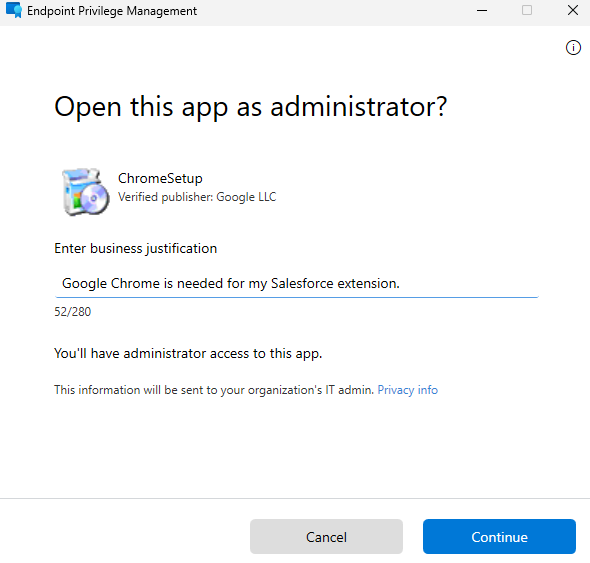
If we try to run the Google Chrome setup with elevated access, we are required to enter a business justification. After clicking continue, the installation successfully starts.
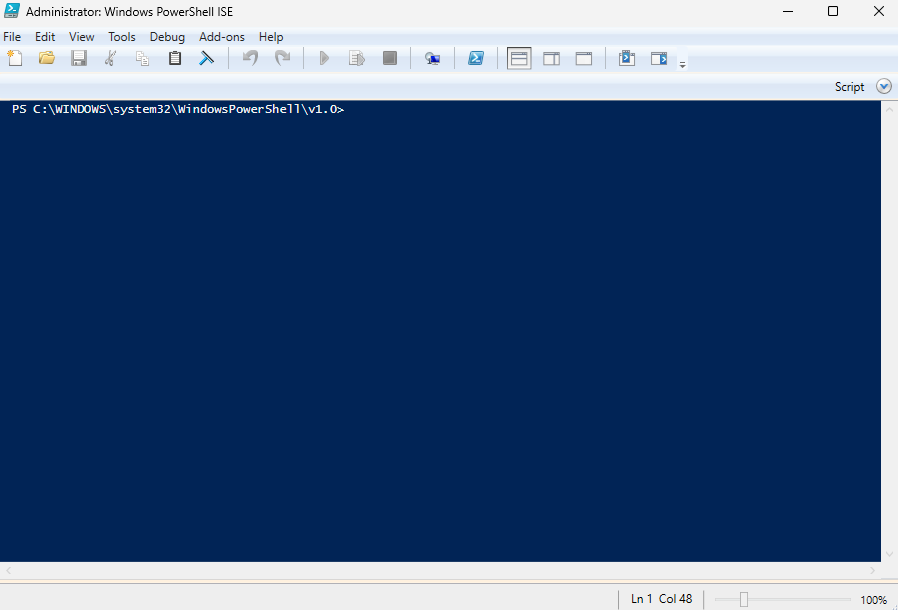
If we do the same for the PowerShell ISE application, as excepted this starts without any interruptions.
Conclusion
While the Endpoint Privilege Management feature is still missing some features, I believe it is a great start. During Microsoft Ignite last year, we were shown how elevation on admin approval could be configured in the future. As you can see in the picture below, this is something we can look forward too.

It’s a shame that the Endpoint Privilege Management feature is only available in the new Microsoft Intune Suite add-on license. Personally, I think it should be included in the Microsoft 365 E5 license, or at least released as a standalone add-on. The EPM feature can provide significant benefits to organizations of all sizes.
EDIT: Within a month Microsoft has brought this feature into general availability and also they listened to user feedback because they introduced a standalone license for EPM!
What do you think of the new Endpoint Privilege Management feature? Let me know in the comments.
First look at Endpoint Privilege Management
Would you like to share your thoughts?
Your email address will not be published. Required fields are marked *
0 Comments