Quick Guide: Creating a Sensitivity Label policy
If you want to grant your users the ability to apply Sensitivity Labels to content, you’ll need to create a Sensitivity Label policy. This quick guide will walk you through the steps of configuring the policy and provide some useful information to help you along the way.
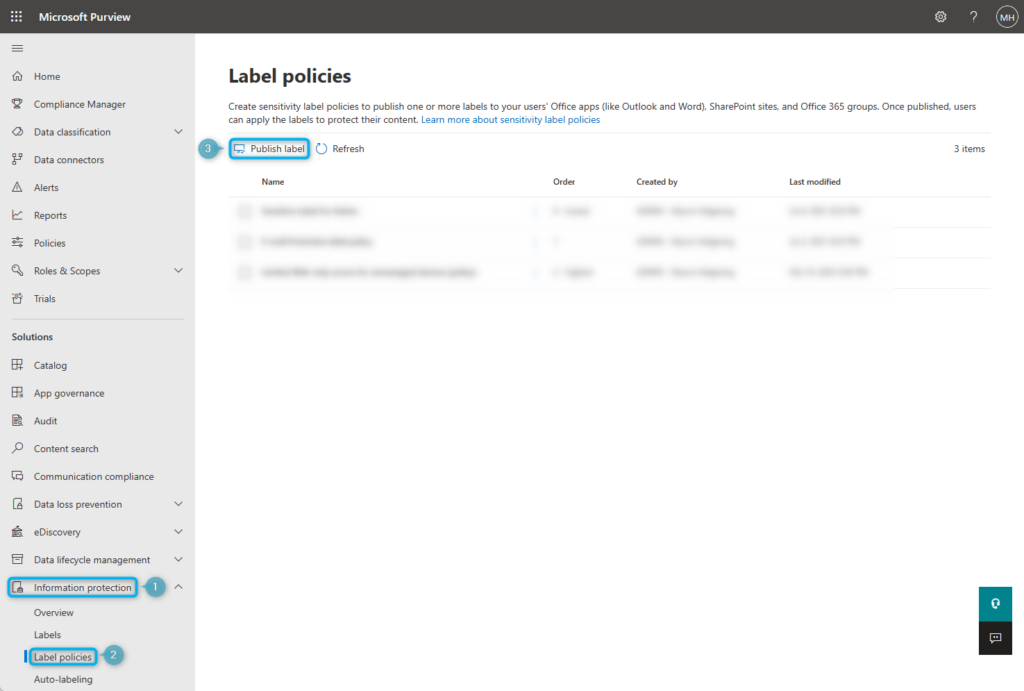
- Go to Microsoft Purview (former Compliance Admin Center) and navigate to Solutions > Information Protection.
- Go to the Labels policies page.
- Click on Publish label, to create a new label policy.
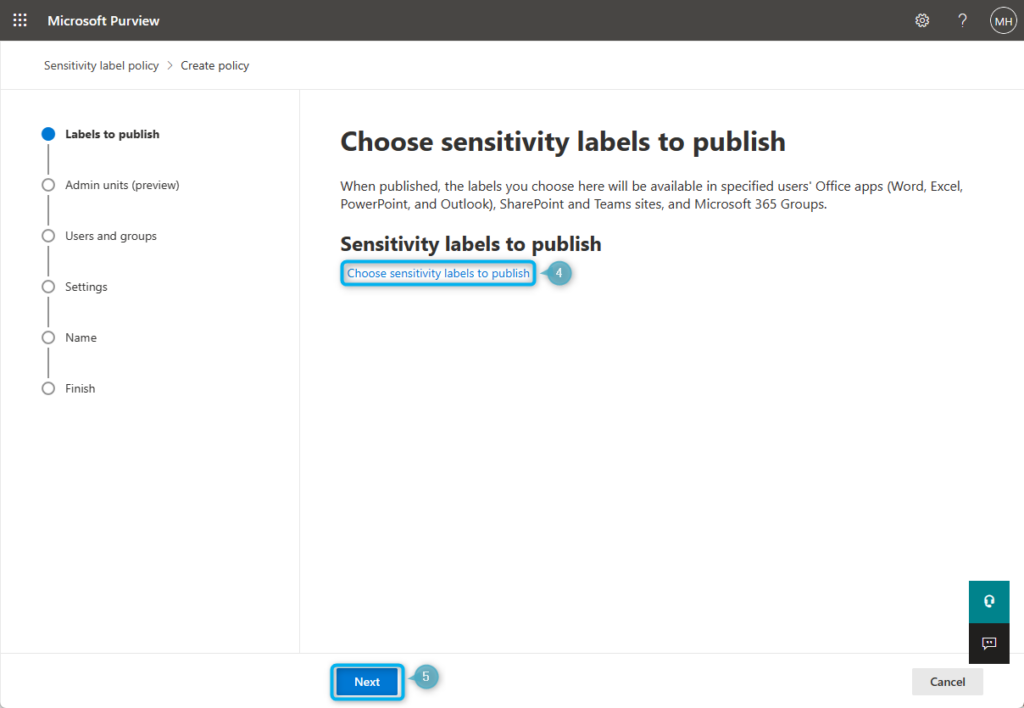
- Click on Choose sensitivity labels to publish and select the Sensitivity labels you want to publish.
- Click Next.
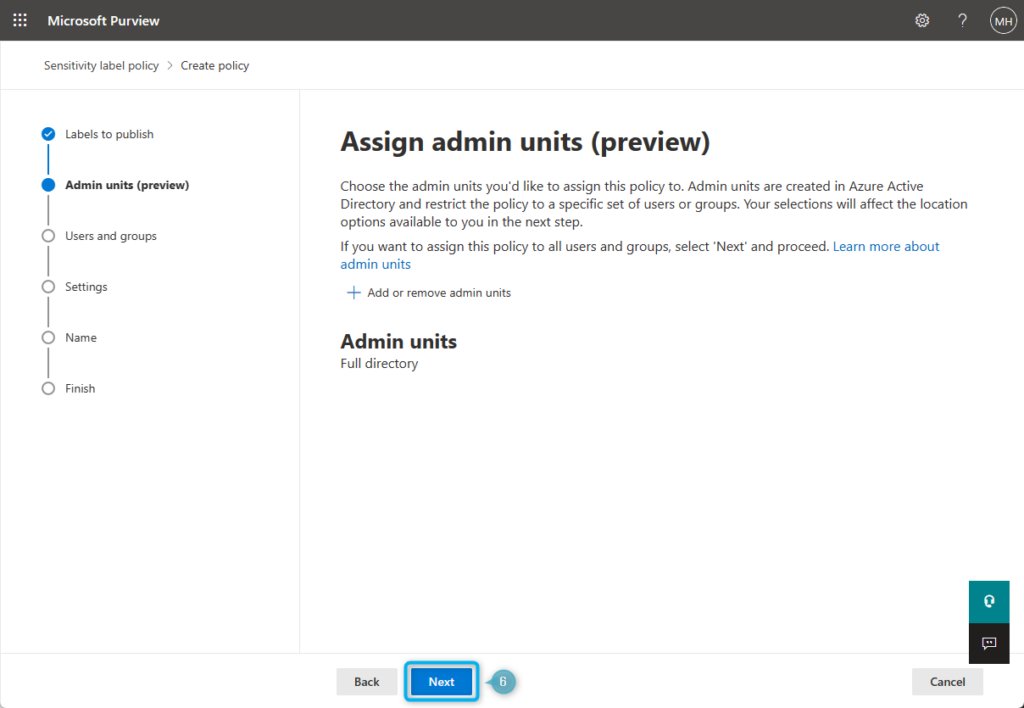
Optional: If you are already using administrative units to divide people into different containers, you can scope the policy to those containers. By scoping the policy, you will only be able to select members from the selected administrative units in the next step.
- Click Next.
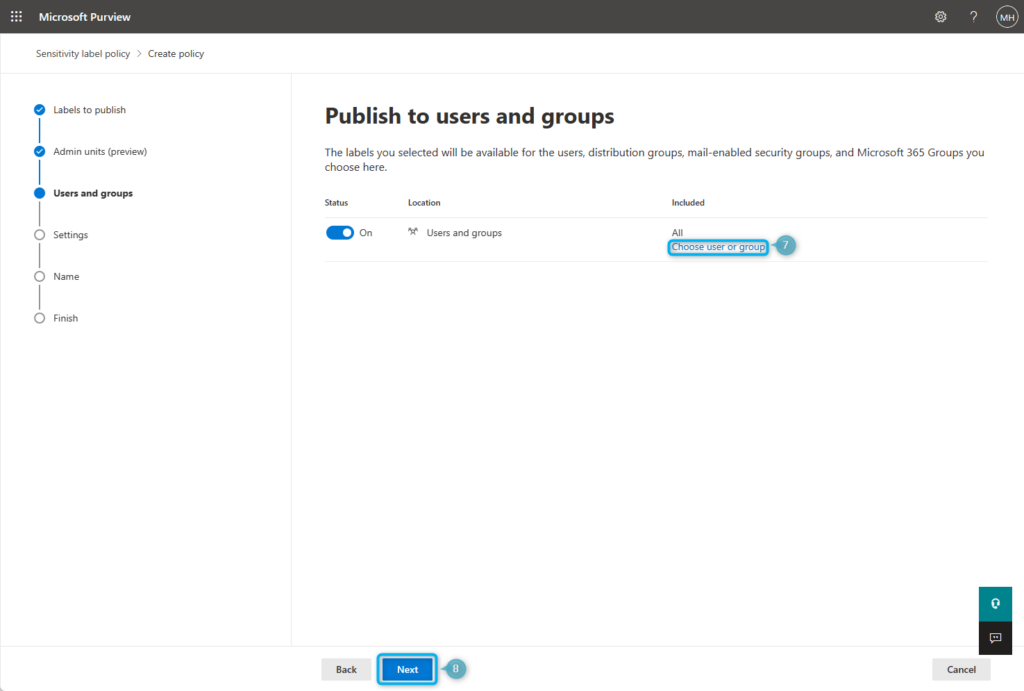
- Click on Choose user or group and select the desired users, or alternatively leave the setting on All to include all users.
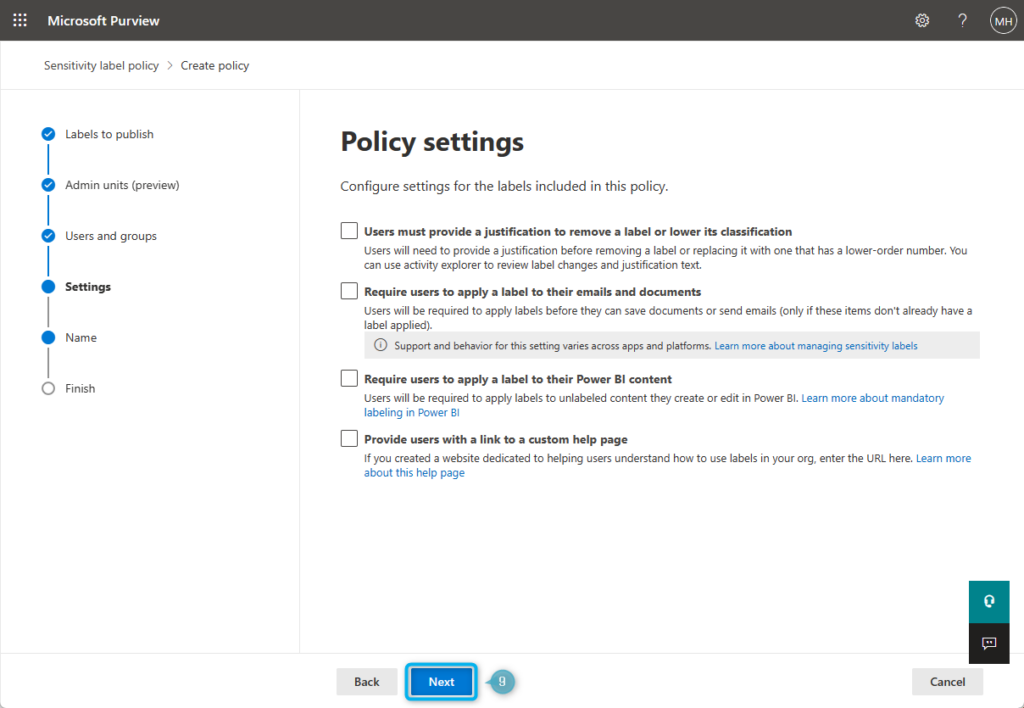
- Click Next. (if you want to publish the labels without configuring any additional settings, you can move on to step 11)
- Optional: You can require users to provide justification when they remove a label or lower its classification. This can improve security by ensuring that users cannot lower the security of a document or resource without providing a valid reason.
- Optional: You can also require your users to apply labels to all e-mail, documents and PowerBI content they create. However, I wouldn’t recommend doing this unless you are confident that you have provided users with enough training or guidance so that they know when to use which label.
- Optional: You can also provide users with a link to a help page were they they can learn when to use which label.
- Click Next.
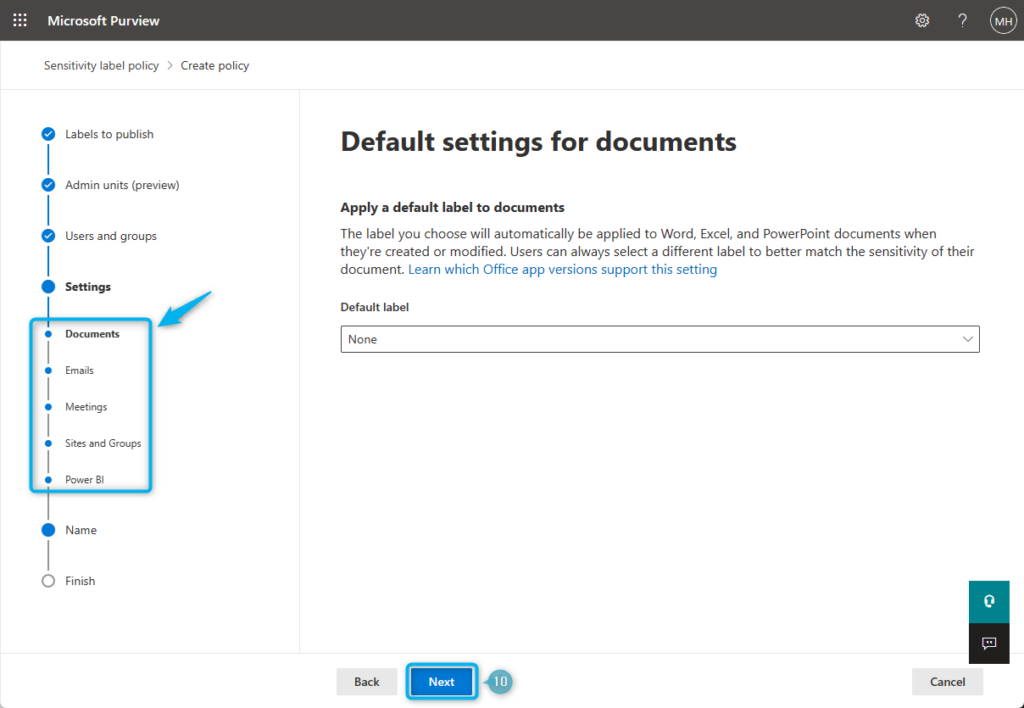
Optional: In the next few pages, you will be able to select default labels for documents, emails, meetings, sites, groups, and Power BI content. This allows you to provide a baseline for all newly created content, if that is what you want to achieve. Please note that you may not see all pages if you are not publishing any labels for a particular type of content.
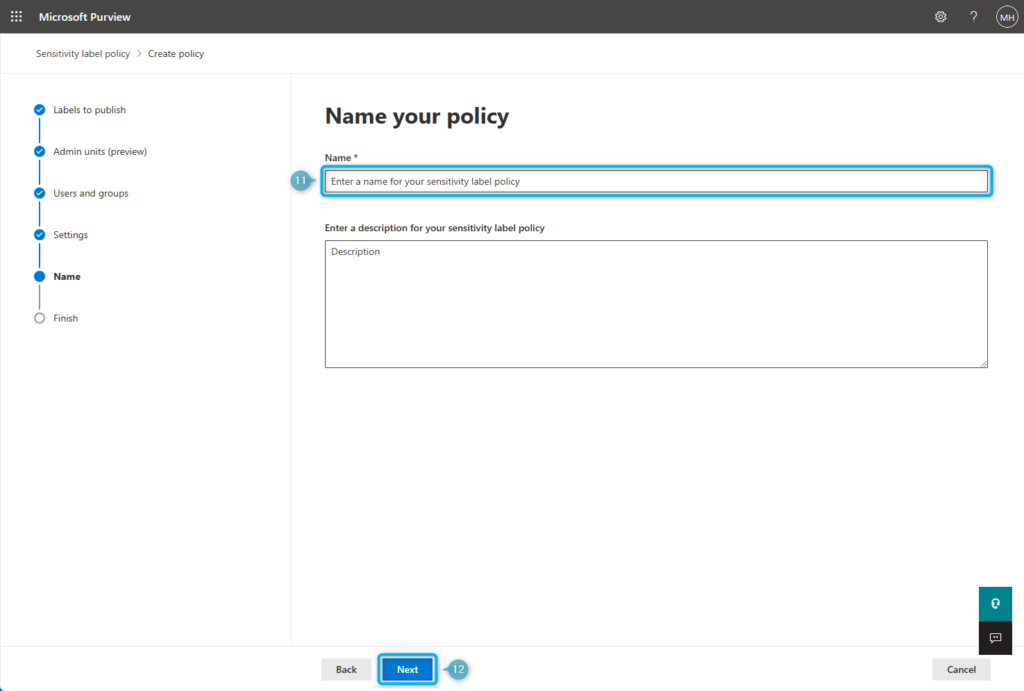
- Click next until you reach the Name page
- Enter a Name and optionally a description for your policy.
- Click Next and Submit to create the Sensitivity Label policy.
Congratulations! If you have completed this guide users are now able to apply Sensitivity Labels to e-mails, documents and other content. Please note that it can up to 24 hours for labels to show up, so you need to be patient.
Quick Guide: Creating a Sensitivity Label policy
Would you like to share your thoughts?
Your email address will not be published. Required fields are marked *


0 Comments