Quick Guide: Enable Enhanced Phishing Protection
Enhanced Phishing Protection is a device configuration for Microsoft Defender that many companies overlook. Arguably, it’s not the most important one, but it will still notify our users whenever they type their password or reuse it in places they shouldn’t.
Sadly, this is only applicable whenever users sign in with their actual password on their device. If users sign in with Hello for Business, for example, they will not be notified.
In this quick guide, I will guide you through the steps to configure enhanced phishing protection and show you the user experience.
Enable Enhanced Phishing Protection
- Navigate to the Microsoft Intune admin center and go to Devices.
- Go to the Configuration page in the Manage devices section.
- Click on the Create and +New policy button.
- Select the “Windows 10 and later” platform.
- Select the “Settings catalog” profile type and click the Create button.
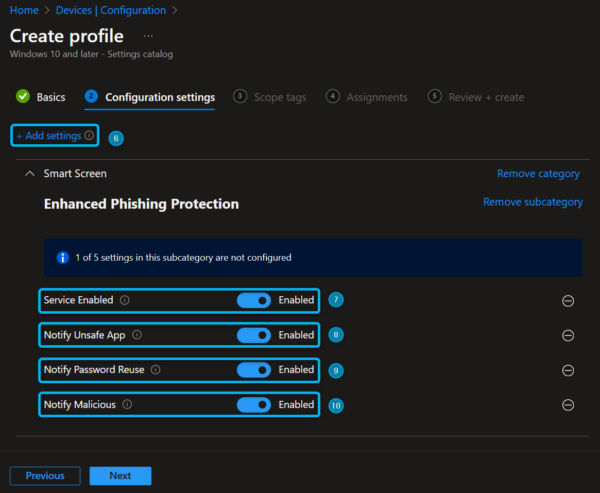
- On the Basics Page, give your policy a Name, and on the configuration settings page, click on the +Add settings button and add the Smart Screen > Enhanced Phishing Protection settings.
- Enable the Service Enabled setting to enable the enhanced phishing protection feature.
- Enable the Notify Unsafe App setting to enable notifications whenever users type their passwords into Word, Notepad, etc.
- Enable the Notify Password Reuse setting to enable notifications whenever users reuse their password.
- Enable the Notify Malicious setting to enable notifications whenever users type their password into a malicious website.
- On the Assignments page, Assign the policy to a group of users or devices.
- On the Review + create page, verify your policy settings and click Create.
User Experience
Once the configuration policy has been successfully deployed onto your devices, you will notice the changes after a new sign-in with your password.
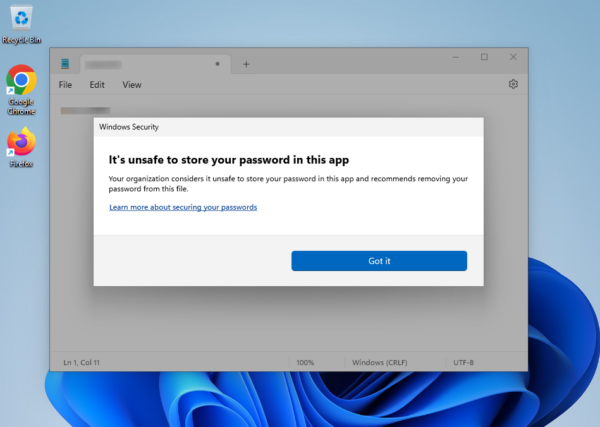
Now, let’s try to type or copy our password into the Notepad application.
As you can see, we are notified that storing our password in this application is unsafe.
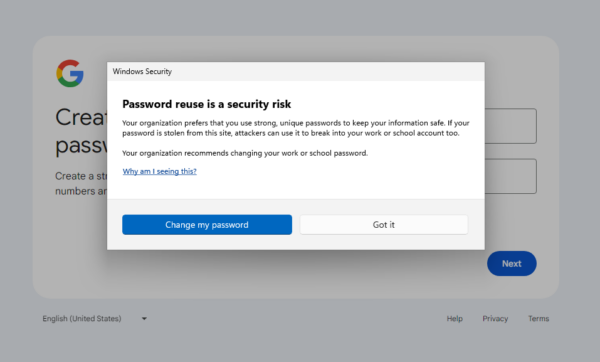
Next, let’s create a new Gmail address and reuse our corporate password to create the account.
As you can see, we’ll be notified again that using our password again is a security risk and that we should change it. Besides the above situations, it will also notify us when we type/copy our password on malicious websites, but this is hard to reproduce as Microsoft Defender for Endpoint and SmartScreen will already block most of those websites anyway.
If you followed this quick guide, you have successfully enabled enhanced phishing protection to protect your users’ passwords. Good job, stay safe, and have a great day!
Quick Guide: Enable Enhanced Phishing Protection
Would you like to share your thoughts?
Your email address will not be published. Required fields are marked *


0 Comments