Quick Guide: How to configure a break glass account and alert on sign-in
In short, we can use a break glass (or emergency access) account to regain access to our Microsoft Cloud environment during critical situations where admin access has been lost or is not possible. Examples of situations are:
- Multi-factor authentication server outage.
- Mistakes while configuring conditional access policies.
- Malicious admin account takeovers.
- Admin users leaving the company.
If you create such an account, it’s important to set up an alert rule to receive notifications of any sign-ins.
This post is a quick and efficient guide on how to configure a break glass account and alert on sign-in.
Creating the break glass account
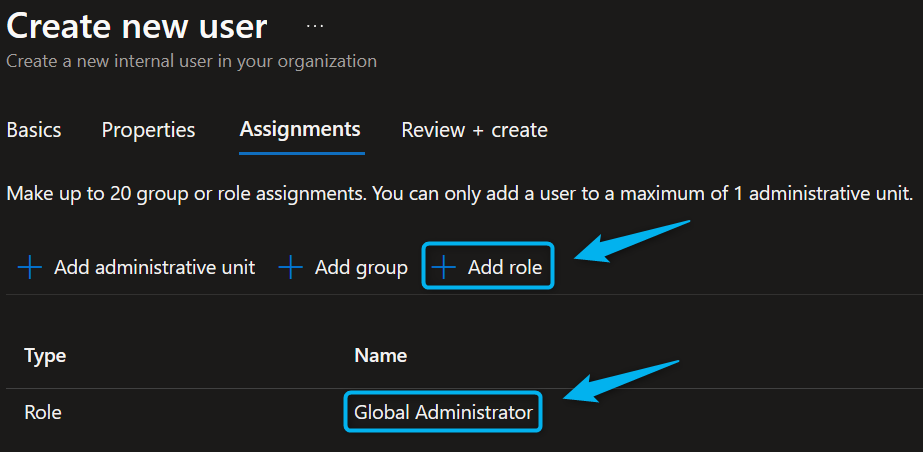
- Navigate to the Microsoft Entra admin center and create a new user account.

Pick a name that will not reveal this is your break glass account; for example, use a random fake first and last name and make the password long and complex. Microsoft recommends creating two break glass accounts, so if you want, create another one.
- Assign the global administrator role.
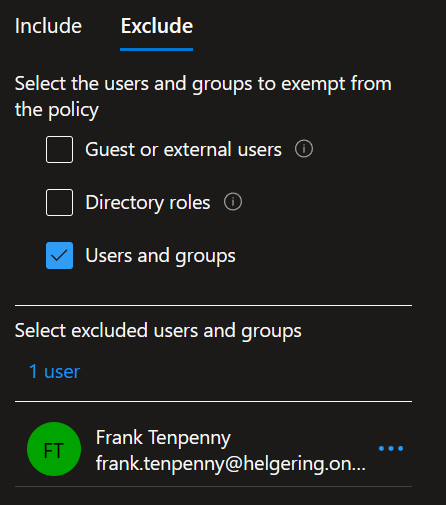
- Exclude the account from your conditional access policies.
- Now, store the credentials somewhere safely, such as a physical vault, and schedule to test the sign-in regularly.
Creating and configuring the alert on sign in
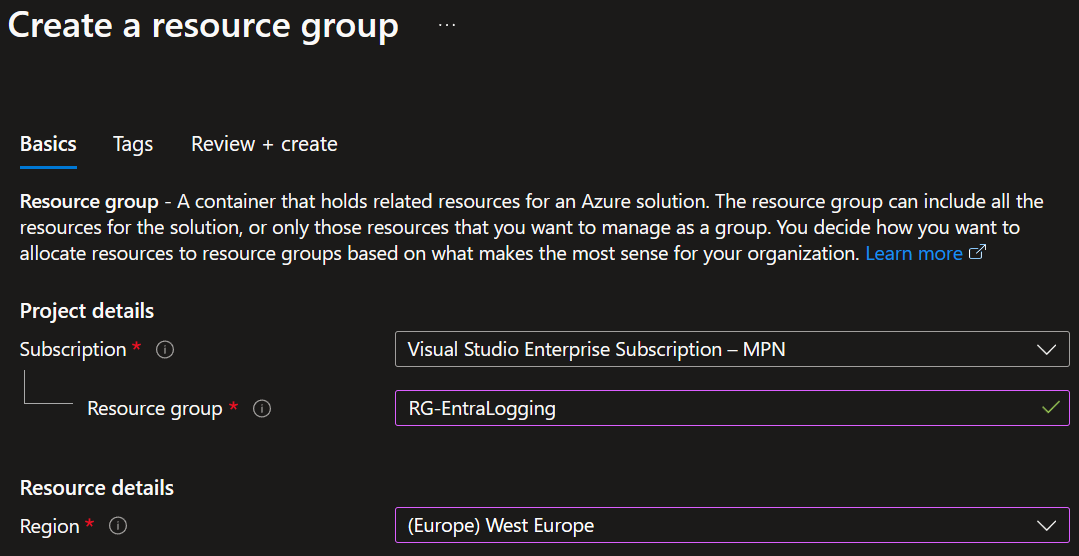
- Navigate to the Microsoft Azure admin portal and create a new resource group.
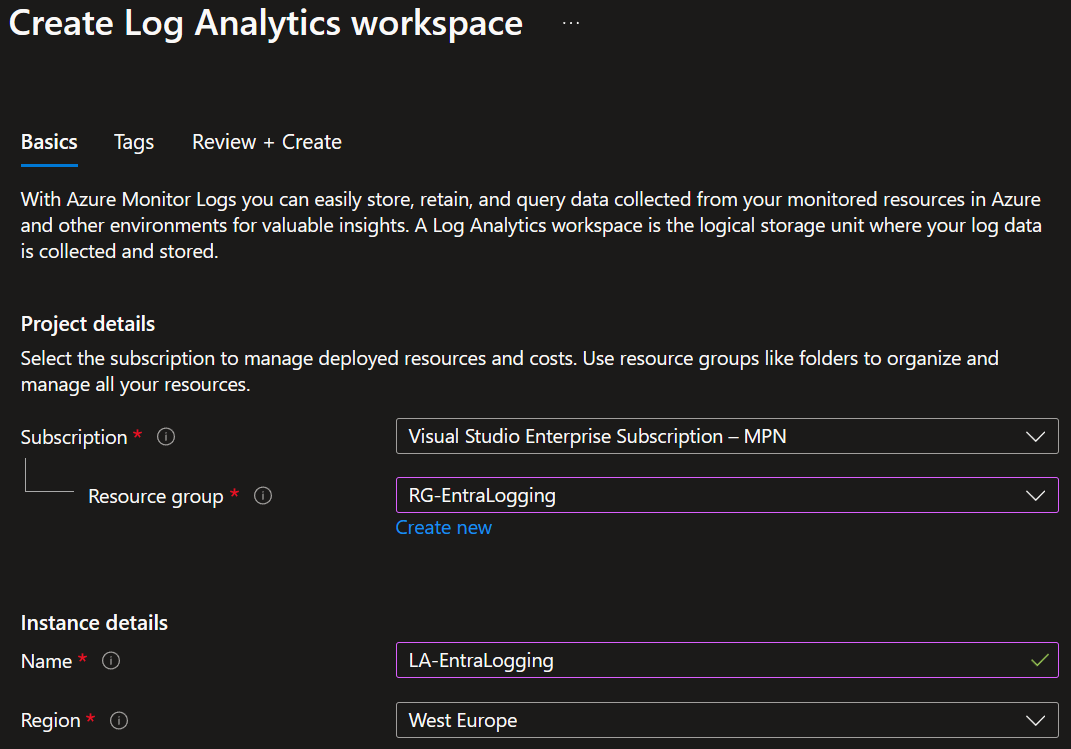
- Create a log analytics workplace and use the resource group as your location.
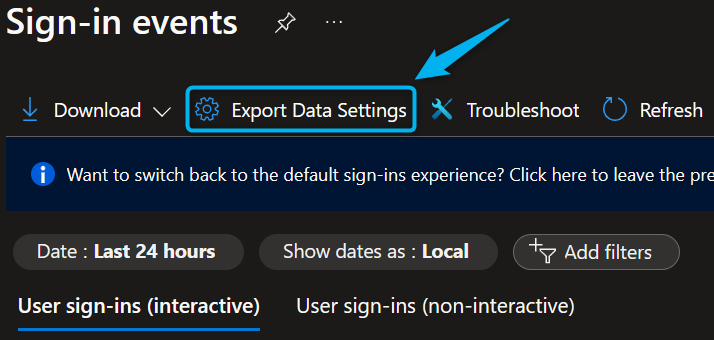
- Navigate to the sign-in events page, go to the Export Data Settings, and then click the + Add diagnostic setting button.
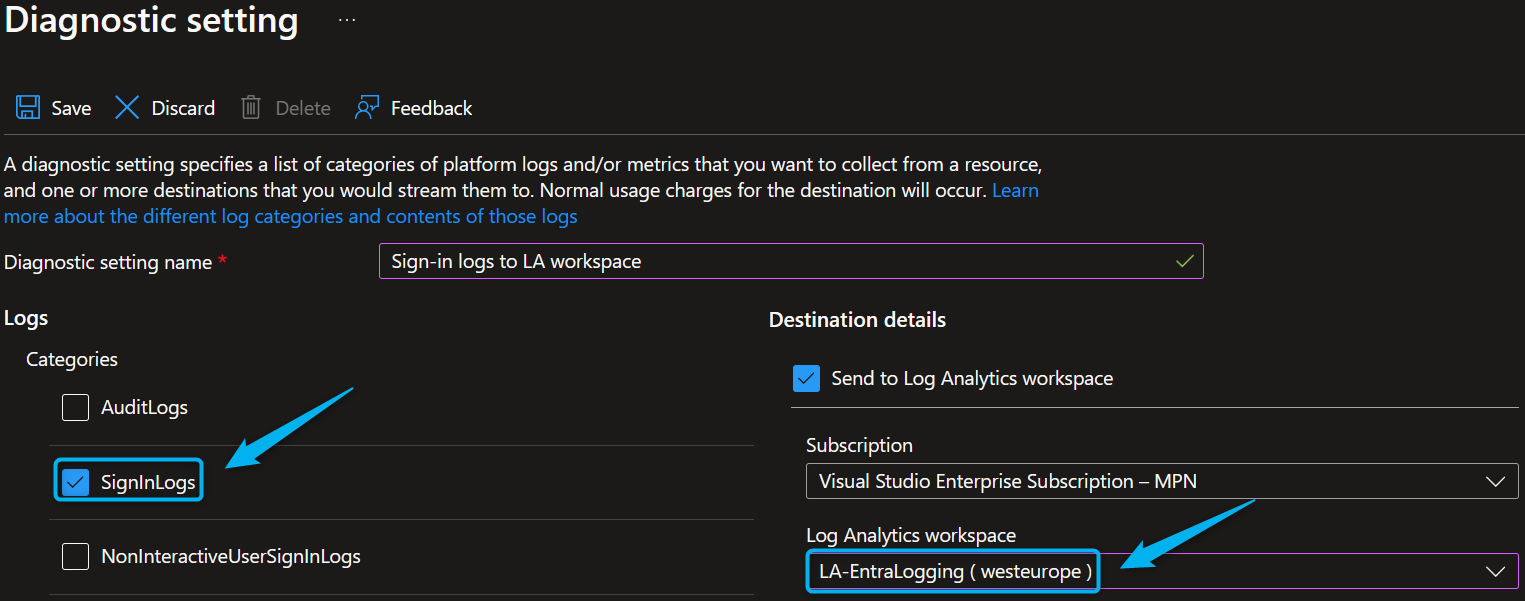
- Configure the sign-in logs to be sent to your log analytics workspace.
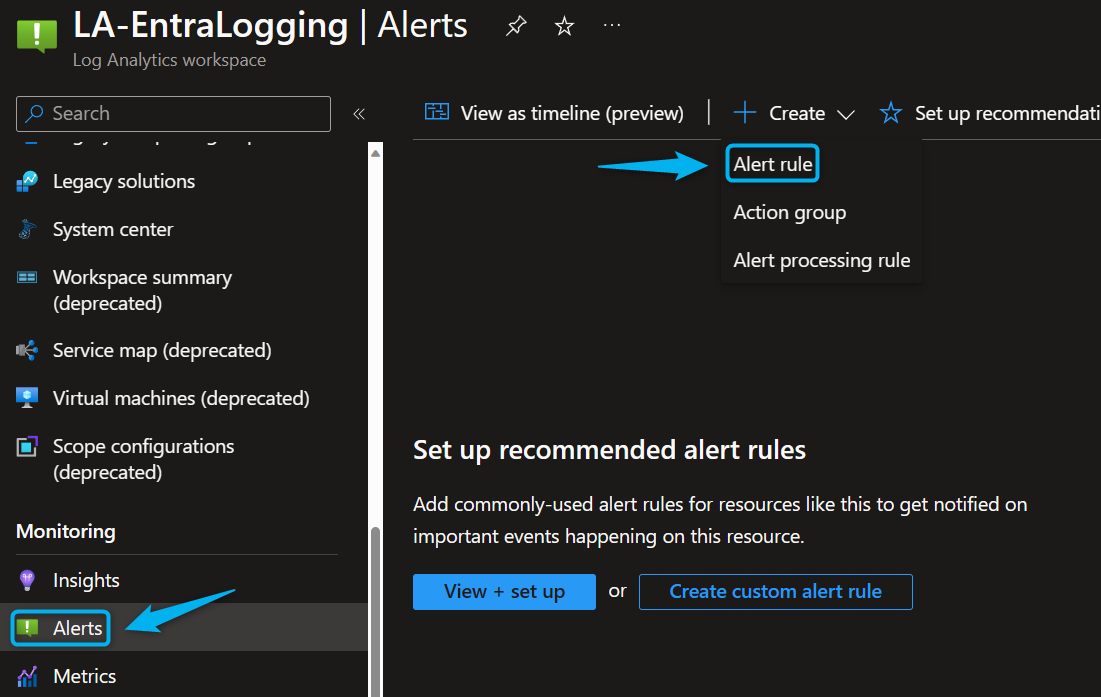
- Find your log analytics workspace and click create alert rule
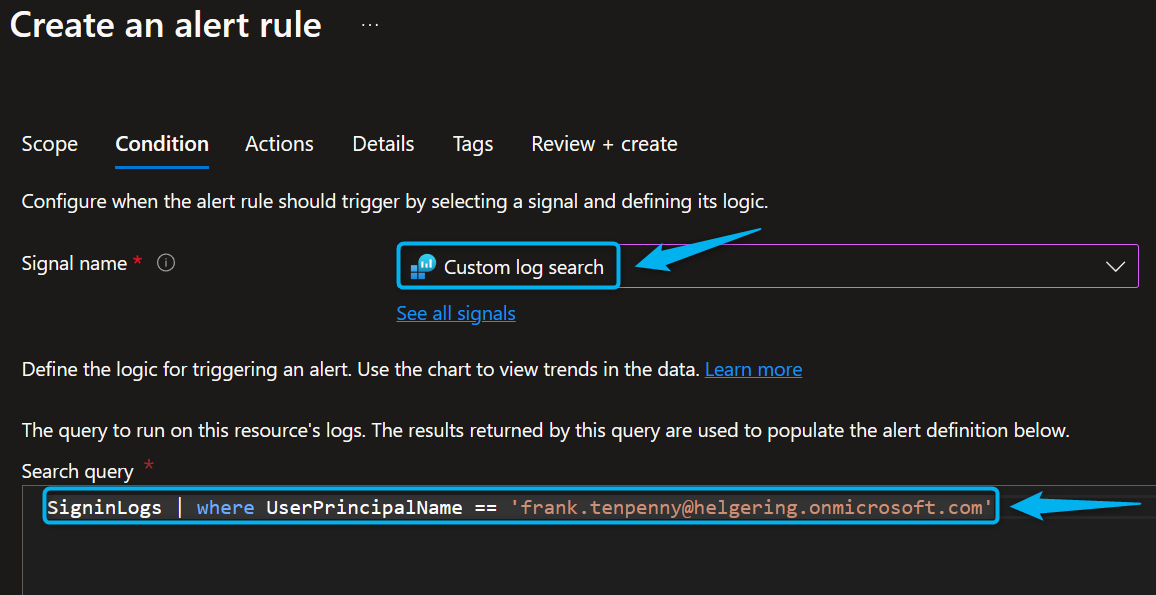
- Select the Custom log search signal name and copy and paste the following query into the query box.
| SigninLogs | where UserPrincipalName == ‘NAME.LASTNAME@DOMAIN.onmicrosoft.com’ |
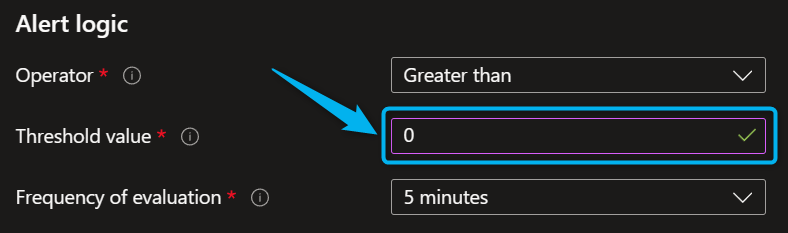
- Set the alert logic threshold value to 0.
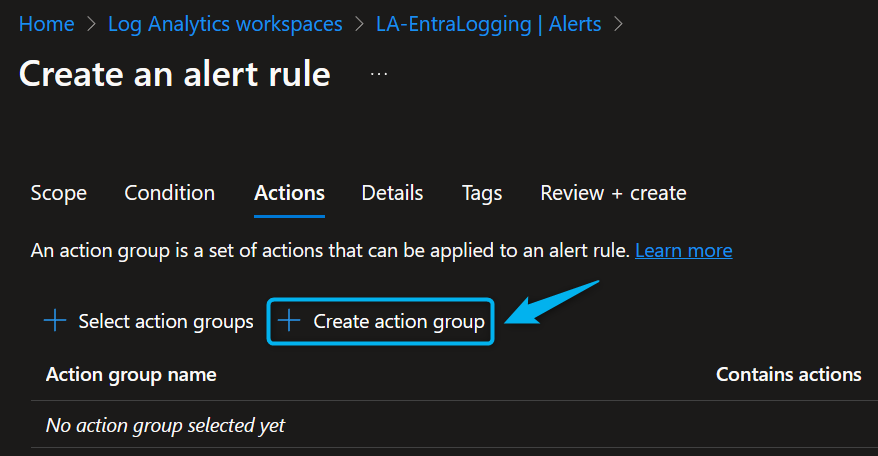
- Go to the actions section and create a new action group.
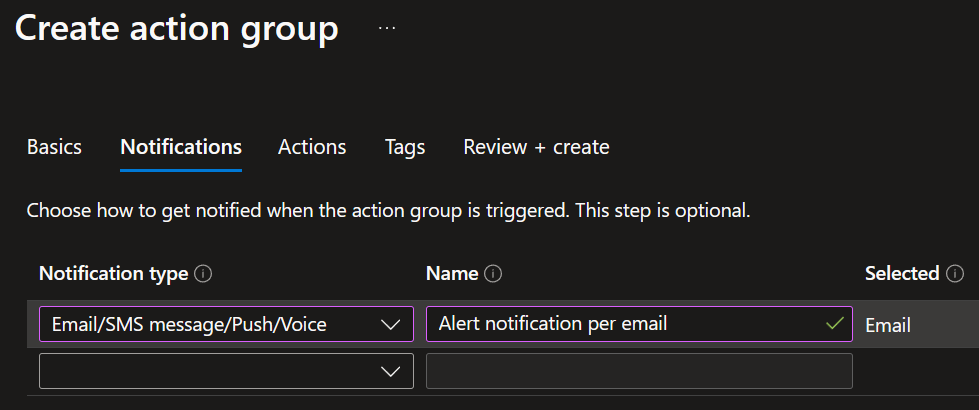
- Give your action group a display and group name.
- Configure your preferred notifications, such as e-mail, SMS, voice, or mobile app notifications.
- Complete the creation of your action group.
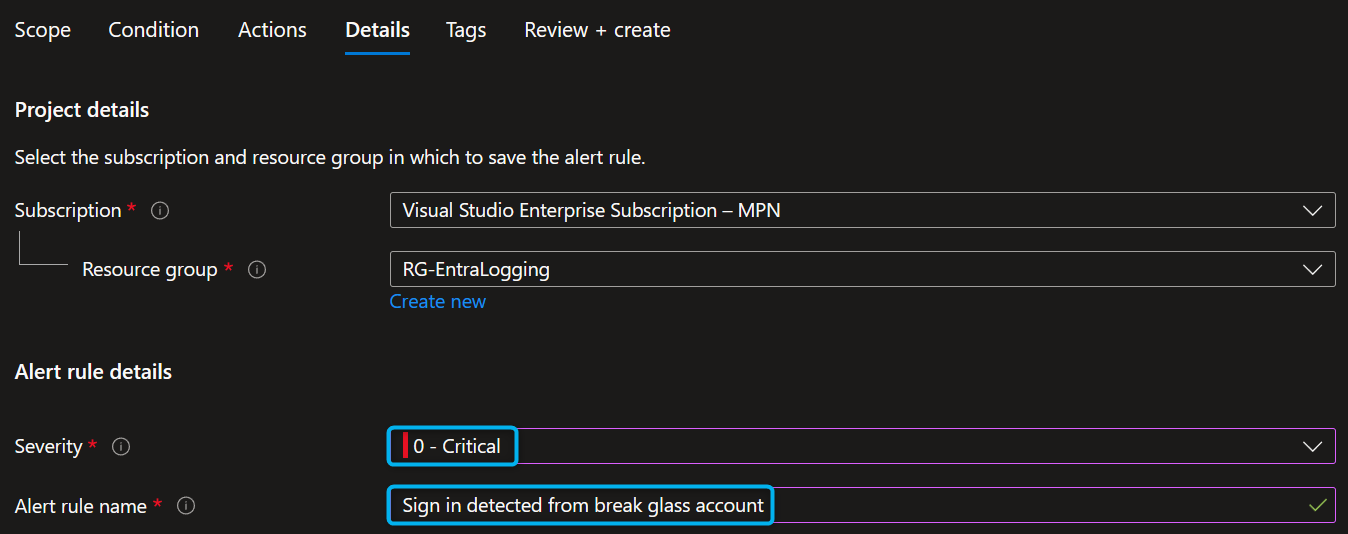
- Go to details, set the severity to critical, and give your alert rule a name.
- Complete the creation of your alert rule.
- Sign in to your break glass account to confirm the alert rule and notification are working as expected.
Congratulations, you have successfully created the break glass account and alert rule.
Quick Guide: How to configure a break glass account and alert on sign in
Would you like to share your thoughts?
Your email address will not be published. Required fields are marked *
0 Comments