How to use Authentication Contexts with Sensitivity Labels
Update: Microsoft recently brought the authentication context feature into general availability, but this came with an extra licensing requirement for protecting SharePoint sites and OneDrive; the new SharePoint advanced management license is required going forward. Read more about the license here.
The Authentication Contexts feature has been in preview for nearly two years, but it seems to have gone largely unnoticed, it still being in preview might be one of the reasons though. The feature itself adds value by providing an additional layer of security to specific locations, applications, or during user interactions. This way we can achieve a balance between security and productivity since we can apply additional security measures only when necessary.
Authentications Contexts can be configured for different purposes and can integrate with different solutions, for example;
- You can use it with a Microsoft Defender for Cloud apps session proxy to secure file uploads and downloads to and from a cloud app.
- You can use it when someone activates a privileged role within Privileged Identity Management.
- You can integrate it with other SaaS or Line-of-business apps that stores sensitive data and secure them.
- You can use Sensitivity Labels to protect SharePoint or team sites.
So when should you use this feature? Microsoft provides us with a great example to understand at least one of these use-cases.
An organization may keep files in SharePoint sites like the lunch menu or their secret BBQ sauce recipe. Everyone may have access to the lunch menu site, but users who have access to the secret BBQ sauce recipe site may need to access from a managed device and agree to specific terms of use.
In this blog post, I am going to show you how to use Authentication Contexts with Sensitivity Labels to protect SharePoint or team sites, it will include the following sections;
- Preparation
- Create Authentication Context
- Configure Conditional Access policy
- Create Sensitivity Label
- Apply Sensitivity Label
- User Experience
Preparation
I quite like Microsoft’s secret BBQ sauce recipe example, so lets just go with that! However, in our scenario, we will be requiring three access controls.
- To gain access to the secret BBQ sauce recipe site, users must authenticate with MFA, use a compliant device, and accept the terms of use.
To configure this, we will need the following licenses at a minimum.
- M365 E3/E5, O365 E3/E5, EMS E3/E5 or Business Premium subscription; for implementing Sensitivity Labels.
- Microsoft Intune license; for managing devices with Microsoft Intune and assigning compliance policies.
- Azure Active Directory Plan 1 license; for implementing Conditional Access and terms of use policies.
- SharePoint Online license; for users accessing the secret BBQ sauce recipe site.
To meet the technical requirements, we will also need to have following things in place;
- Ensure that users who have access to the secret BBQ sauce recipe are registered with MFA and can work from a compliant device.
- Create and upload a terms of use document that users must accept before accessing the site. If you haven’t created one yet, Microsoft has a quick guide right here, just follow the first step “Create your terms of use”.
- If you haven’t already, enable Sensitivity Labels for containers or else you will not be able to create Sensitivity Labels for SharePoint or team sites. I have written a quick guide on how to enable this right here.
Create Authentication Context
In the next few chapters, we are going to create an Authentication Context, define our access controls in an Conditional Access Policy, and configure a Sensitivity Label that we can apply to SharePoint sites we want to protect.
Now lets start off with creating the Authentication Context by following these steps;
- Go to the Microsoft Entra admin center and navigate to Protect and Secure > Conditional Access
- Go to Authentication context.
- Click on the + New Authentication context button.

- Enter a name for your Authentication Context and optionally a description.
- Keep the Publish to apps option selected, which makes the Authentication Context assignable.
- Give your Authentication Context an ID. This ID can be used as a reference for developers when implementing Authentication Context for other business apps.
- Click Save.

With the Authentication Context now created, we can move on to creating the Conditional Access policy. Keep in mind that if you ever need to delete the Authentication Context, you must remove it from your Conditional Access policies first; otherwise, the option to delete it will be greyed out.
Configure Conditional Access policy
Let me first explain the function of the Conditional Access policy we’re about to configure. This policy will define the access and sessions controls that we want to enforce whenever an application triggers the authentication context we setup previously. For this scenario, we will be enforcing three different access controls when the authentication context is triggered;
- User must authenticate with MFA.
- User must accept the terms of use.
- Device must be compliant with assigned Compliance Policies.
Remember to choose your own access controls or session controls, whichever best fits your scenario. For instance, accessing the Secret BBQ sauce recipe site may require different controls than accessing the company’s HR site or even activating an admin role with Privileged Identity Management.
Now that you understand what the policy is suppose to achieve, lets move on to configuring it by following these steps;
- Go to Microsoft Entra admin center and navigate to Protect and Secure > Conditional Access
- Go to Policies.
- Click on the + New Policy, to create a new Conditional Access Policy.

- Configure the Conditional Access Policy as described in the table below.
| Name | Give the policy a name that fits your company’s naming convention. |
| Users | Select a group of users to apply the policy to. |
| Cloud apps or actions | Select the Authentication Context we have created earlier. |
| Conditions | {optional} |
| Grant | I will select the Require multi-factor authentication, Require device to be marked as complaint and the terms of use access controls, but select anything you need for your scenario. |
| Session | {optional} |
If you want, you can safely turn on the policy now because it will not take effect until we start applying Sensitivity Labels to SharePoint sites or Microsoft team sites.
Create Sensitivity Label
With the Authentication Context and access controls configured, the next step is to create a Sensitivity Label and link it to the Authentication Context. This will make sure the Sensitivity Label will enforce the access controls we created earlier.
Follow these steps to create the Sensitivity Label;
- Go to Microsoft Purview (former Compliance Admin Center) and navigate to Solutions > Information Protection.
- Go to the Labels page.
- Click on + Create a label, to create a new sensitivity label.
Optional: You can also choose to create a sub-label if you’re already using Sensitivity Labels.

- Enter a Name, Display name and a Description for users that fits your company’s labeling naming convention and strategy.
Optional: Enter a Description for admins or Label color.
- Click Next.

- Select Groups & sites. (The “Groups & Sites” option being greyed out indicates that container support for Sensitivity Labels has not been enabled yet, click here for a quick guide on how to enable it)
- Click Next twice. (skip the Items page)

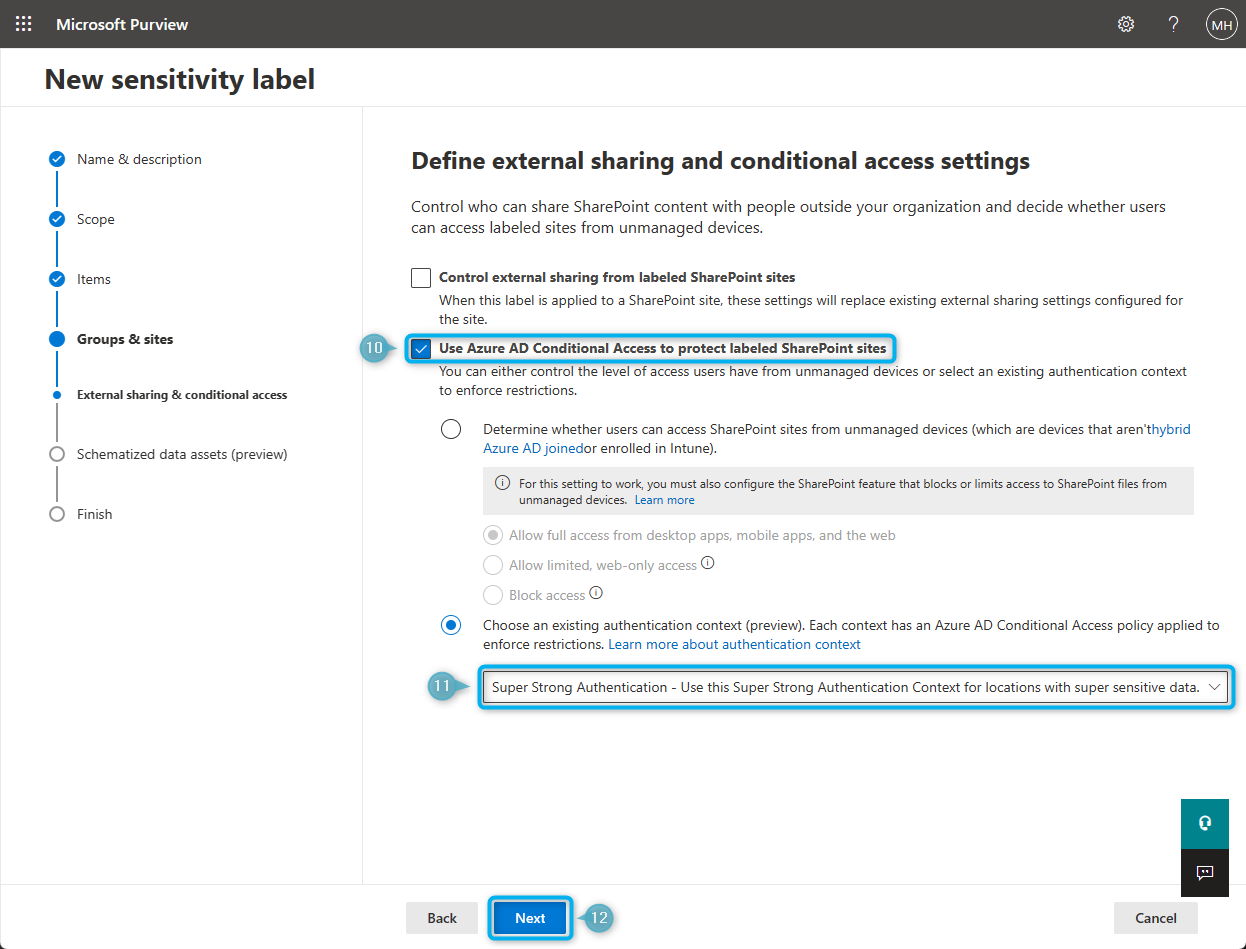
- Select External sharing and Conditional Access settings.
Optional: You can also select privacy and external user access settings to combine Authentication Contexts and Sensitivity Labels with other settings that are configurable within Sensitivity Labels such as external sharing settings, external user access and privacy settings. These are great additions to add even more value to this sensitivity label.
- Click Next.

- Select Use Azure AD Conditional Access to protect labeled SharePoint sites.
- Select the Authentication Context option and select the one we created earlier, in my example it is called Super Strong Authentication.
- Click Next twice. (skip the Schematized data assets page)
- Review youre settings on the Finish page and click on the Create Label button to finish the configuration.
After completing these steps, you are now ready to apply the Sensitivity Label to the sites in order to enforce the access controls that we have configured earlier.
Apply Sensitivity Label
Before you are able to apply the Sensitivity Label, you will need to assign it to a Sensitivity Label policy. If you have not created a Sensitivity Label policy yet, you can follow my quick guide on how to create one right here.
If you are ready to apply the Sensitivity Label you can go ahead and follow these steps;
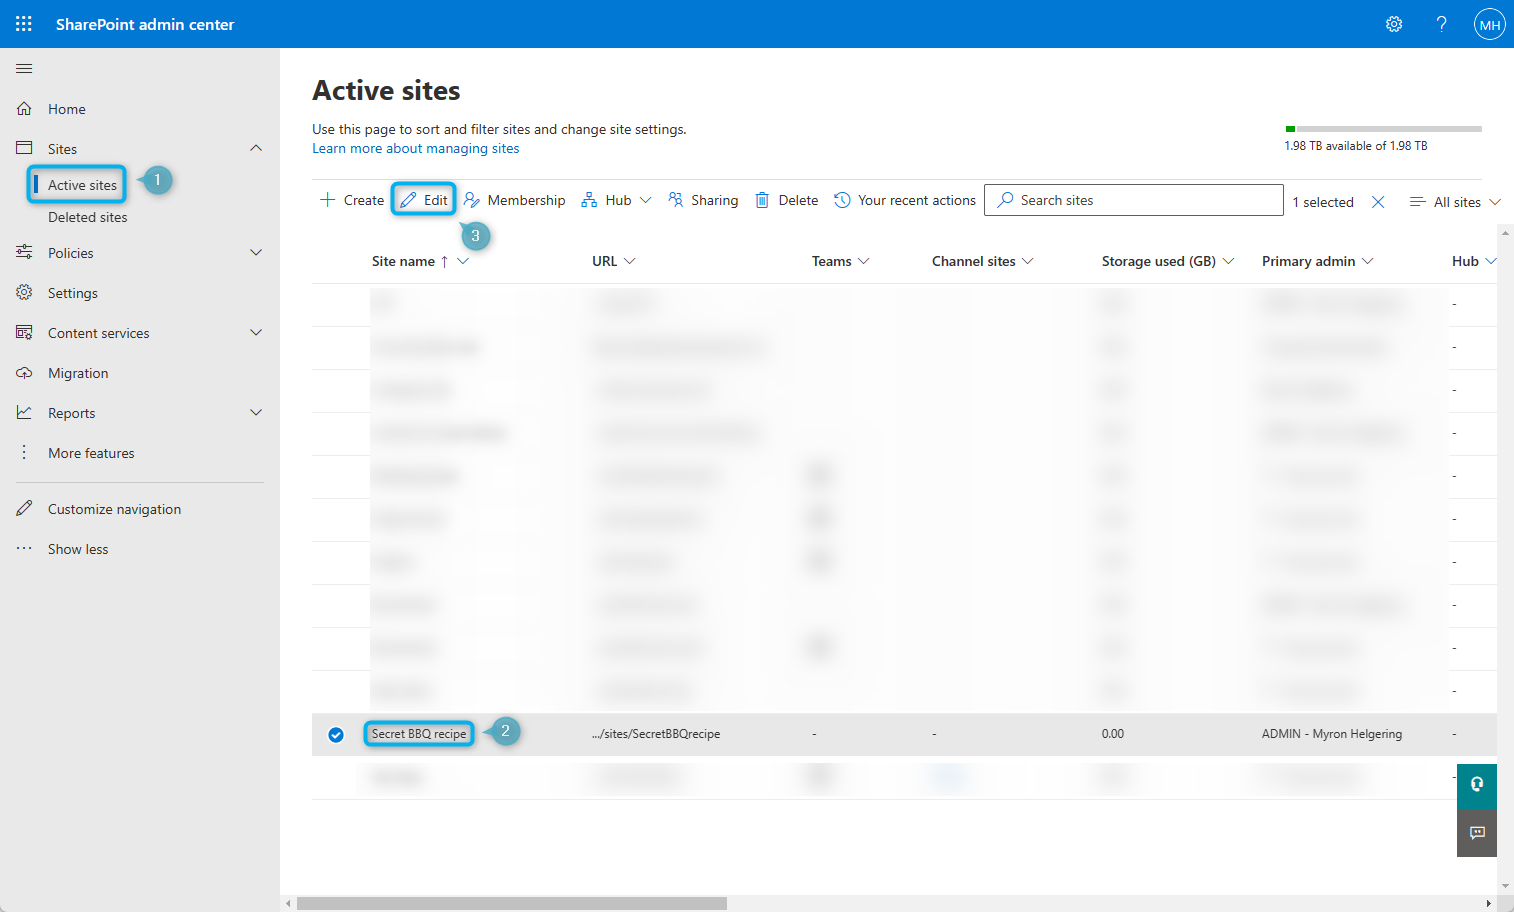
- Go to the SharePoint Admin Center and navigate to Sites > Active Sites.
- Select the Site.
- Click on Edit.
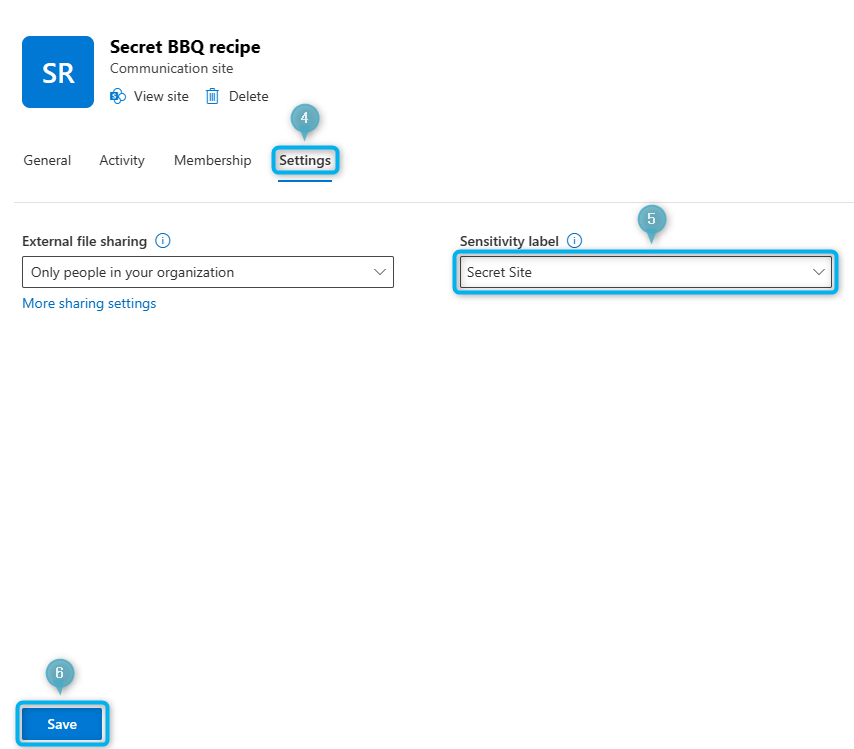
- Go to Settings.
- Select the newly created label. (This can take up to 24 hours after creation)
- Click Save.
We can also use PowerShell to apply labels to multiple sites at once, which can be a more efficient method than applying labels to sites one by one.
After applying the Sensitivity label to the Secret BBQ sauce recipe site, the access controls we configured in the Conditional Access policy should be enforced for users trying to access it.
User Experience
Let’s take a look at the user experience when signing in to the Secret BBQ Sauce recipe site to see if everything we set up is working properly.
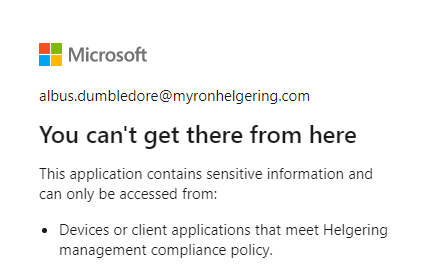
I will start by attempting to sign in from a non-compliant, non-Intune managed device. First, we will need to approve the MFA request if we haven’t already satisfied MFA.
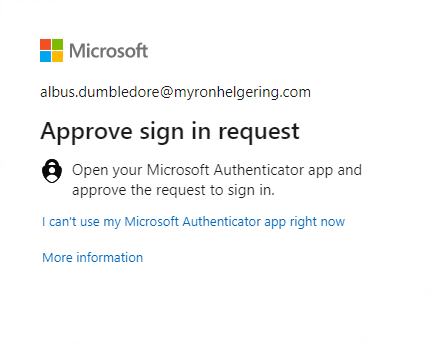
As expected after approving the MFA request, I am unable to access the site from this non-compliant device.
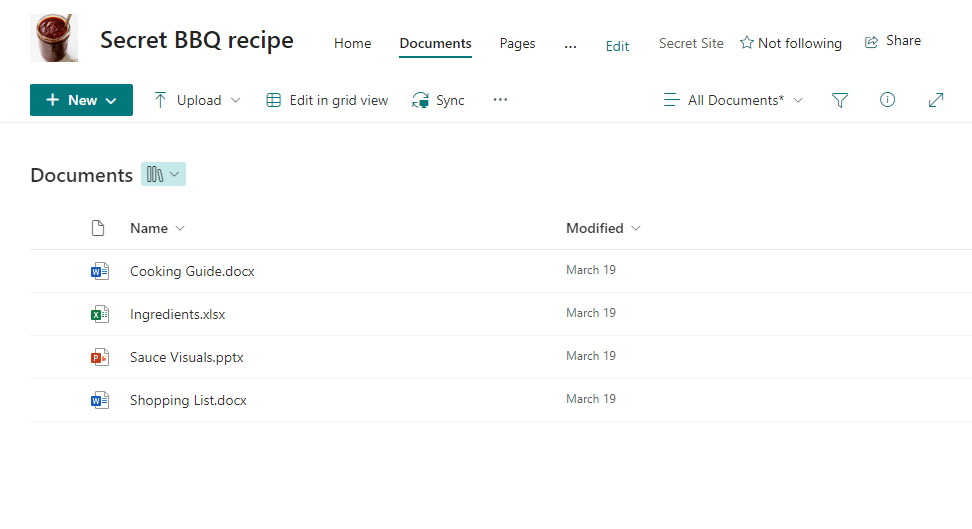
Now let’s attempt to sign in from a compliant device. After satisfying MFA, we will be prompted to read and accept the terms of use before gaining access to the site.

Great, after accepting the terms of use, we are now granted access to the Secret BBQ sauce recipe. Let’s start cooking!
How to use Authentication Contexts with Sensitivity Labels
Would you like to share your thoughts?
Your email address will not be published. Required fields are marked *
2 Comments